So ah know it's been a while. Midterms and all that are just gettin' in the way of the ponies.
So if you want t'make an Applejack T-shirt, it's really easy. All ya need is a yellow T-shirt that's big on you, and orange tie-dye.
Mix the dye according to the package directions.
Scrunch up that shirt real good and randomly toss the dye on it. Ah don't have pictures of this part 'cause ah forgot my camera. Ah'm sorry 'bout that.
Follow the directions for the dye on washing your shirt after you're done.
Should look somethin' like this:
See? Just the kind of shirt you could throw on before workin' on the farm.
Here's what it looks like on a person:
An' if you want to get a li'l fancy? Easy! Just tie the bottom hem into a knot.
(y'all might want to imagine that on someone skinnier. trust me, it works.)
That's all there is to it! Simple tie dye in the right color can make you a great Applejack T-shirt!
I'm sorry, I don't have a lot of pictures for this one. But I'll give you the recipe anyways so you can make these cupcakes. If you want to, or not, either way's okay.
You're going to need:
1 package yellow cake mix
2/3 cup oil (or whatever your cake mix calls for)
4 eggs (again, whatever the cake mix calls for)
zest of one lemon
1 pint whipping cream
1/4 cup sugar
2 tsp vanilla
1/4 cup diced strawberries
Mix the cake mix according to the package directions.
Stir in the lemon zest. You can add more or less so that it's just right for you.
Pour the batter into a cupcake pan and cook according to package directions.
When the cupcakes come out and while they're cooling, you can make strawberry whipped cream.
With an electric mixer, mix together the whipping cream, sugar, and vanilla, until it makes stiff peaks.
Fold in the strawberries.
Spoon the whipped cream on top of the cupcakes. The cream needs to be kept cold, so you might want to store it in the fridge until you're ready to serve the cupcakes. I mean, if that's okay with you.
The frosting does look pinker than that. I'm sorry, I had to take this with my cell phone camera. I really wish I could have gotten better pictures for you. I'm sorry.
So ah bet you want to try some delicious Applejack-inspired cupcakes. Ah'm gonna show you how to make them.
They're gonna be apple pie cupcakes. They just ain't Applejack without some apple in them!
Y'all will need:
3 c flour
1 tbsp baking powder
½ tsp salt
1 c plus 2 tbsp unsalted butter
2 c plus 2 tbsp sugar
4 eggs
1 ½ tsp vanilla extract (That's what the recipe calls for, but ah only used 1/2 tsp and it came out fine)
1 c milk
2 tsp cinnamon
3 large Granny Smith apples, peeled, cored and diced (Ah used apples from my school's dining commons. Weren't Granny Smiths, but they tasted just fine. And they were free.)
Line your cupcake pan with tin foil.
Ah only did this because ah couldn't find paper liners. But it's got the advantage of lookin' like a pie tin.
Mix together the flour, baking powder, and salt.
Cream together 1 cup of the butter with 2 cups of sugar (or 1 cup sugar-Splenda mix, which is what ah did)
Beat the eggs into the mix.
Bake at 350 for 18-22 minutes.
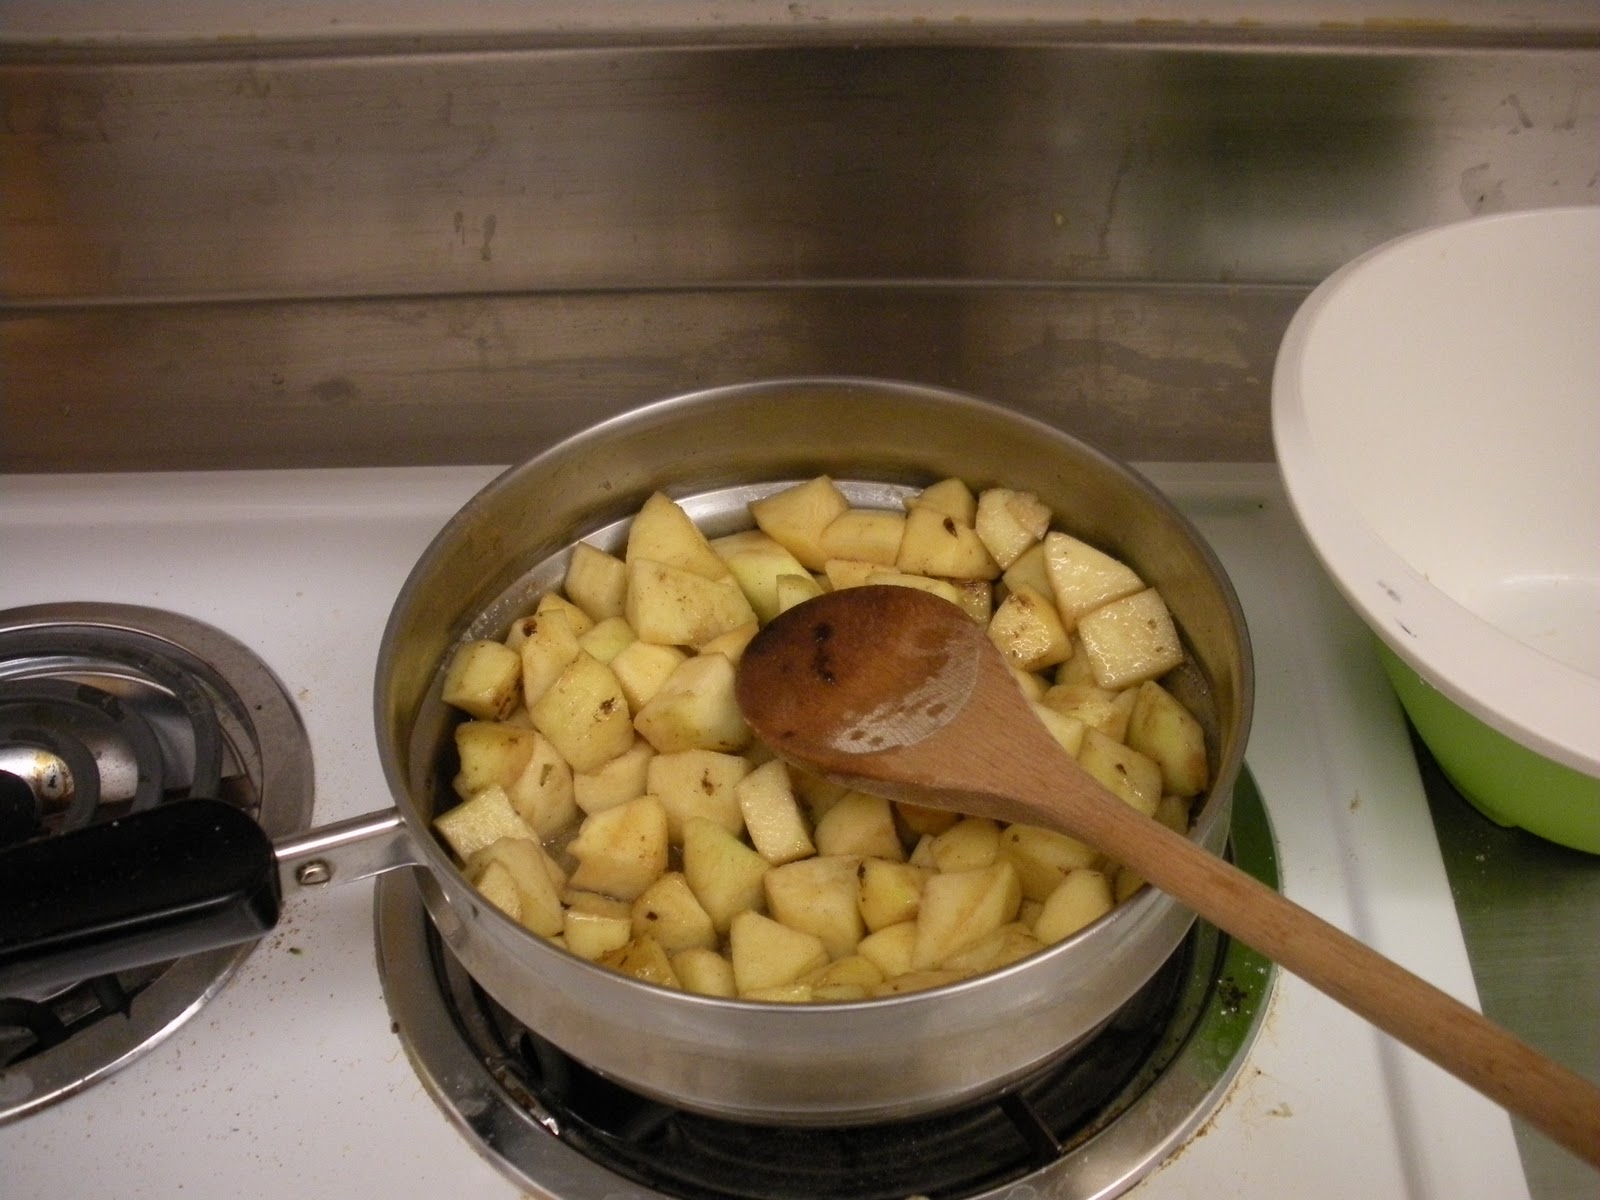
Meanwhile, peel an' dice yer apples.
Cook the apples with the rest of the butter an' sugar, an' the cinnamon.
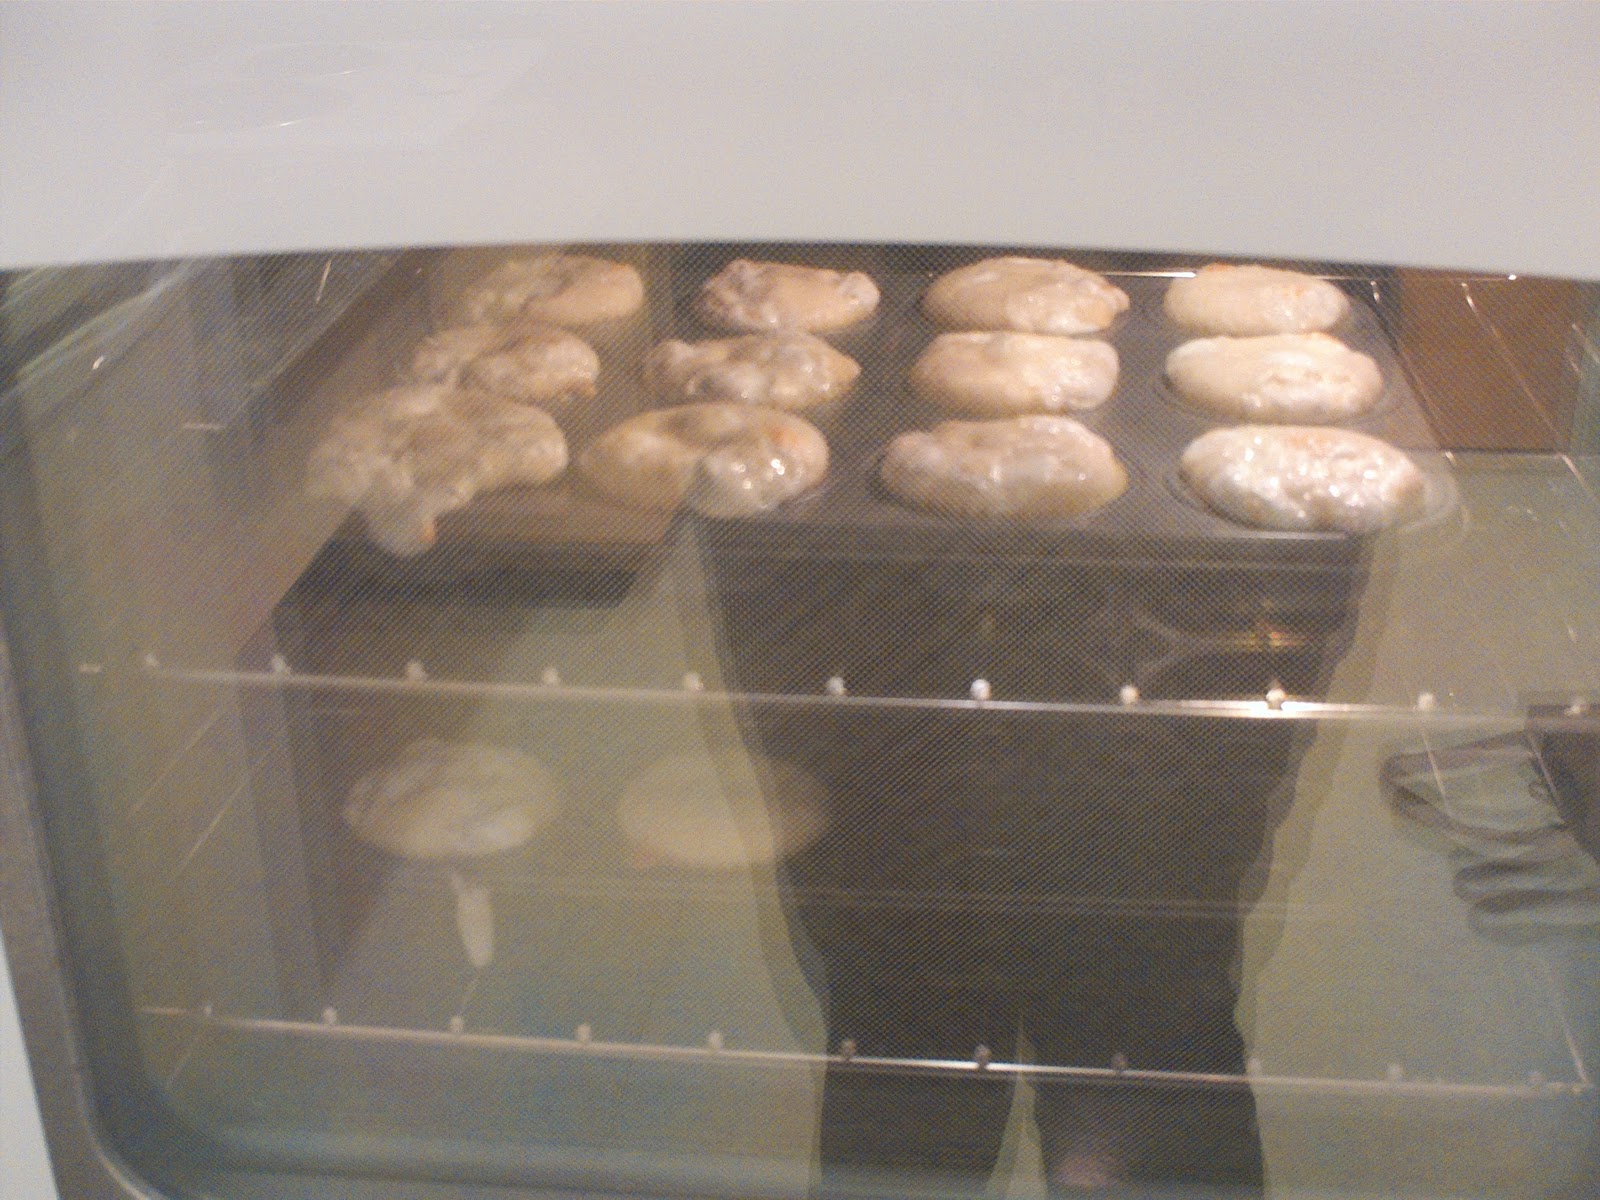
Cupcakes out a' the oven. Don't they look nice?
When the cupcakes are cool, carve a li'l hole in each one.
Put some a' yer apple pie fillin' in the hole. And y'all have some delicious apple pie cupcakes!
Yes, it's a Rarity post again! I get inspired by her a lot.
(it would probably look better on somepony skinnier. but I couldn't find a model, so I had to wear it)
To make this shirt, you'll need the following:
A fitted white shirt
Purple lace (I got a yard and a half for a large shirt)
Iron-on rhinestones
Purple thread
Cut the lace into strips and lay it out on the shirt in the pattern that you like best.
Pin the lace to the shirt. (I got rid of the lace on the sleeves--didn't look quite right. But you can do whatever you think looks best.)
Sew the lace on. I used two straight stitches to make sure it was secured and to get the nice even line. If you happen to have a sewing machine, I highly recommend using it.
Lay out your rhinestones in a pattern that looks best to you. I decided to vaguely follow the shape of Rarity's cutie mark (though I know it's hard to tell) and put some of them under the lace so that little shine peeks through.
Iron on the rhinestones according to the package directions. Make sure that the iron won't melt your lace!
And that's all you need! See, it's easy for anypony to be fashionable with just a little work.
It's another fabulous Rarity post! (for those of you wondering why I haven't gotten to Applejack or Fluttershy yet, don't worry, they are coming)
This manicure is quite easy, actually. Based on the classic French manicure, because you know anypony as fashionable as Rarity deserves nothing less.
Two colors are needed. White (I used one from Claire's, but I do recommend getting something better--I did this earlier today and already my nails are chipping!)
and a deep purple (NYC #205-Midnight Amethyst)
First, paint your nails with the white. You'll likely need two coats.
Then, paint the tip with the purple. To get that beautiful little half-moon shape, use small strokes instead of trying to do one line. It also helps to have your hand flat on a table.
So you made yourself 20% cooler with the Rainbow Dash Shirt and now you can...you know what, this whole 20% cooler thing has been done a lot. Let's just get onto the nail art.
You'll need a lot of colors for this.
Sky blue for the base.
Red, orange, yellow, green, purple nail art polishes (use fine-tipped brushes if you can't find specific nail art polishes) (why no blue? you'll see why)
All of mine were from a dollar store, so they're not really brand name stuff.
Actually the yellow looked kind of gross in the bottle, but worked out fine.
Anyways!
Paint the nails with the sky blue. If you do like I did and buy the cheap dollar store polish, you'll need two coats and it'll take about an hour to dry.
Or find some quick-drying polish. I timed one of those one time and it actually did take ten seconds flat. Couldn't find it for this color unfortunately.
Use the nail art pens to draw a zigzag line on each nail, each nail with a different color.
Like so. Except not blurry.
I don't have the manual for my camera, I can't change the settings, okay?
And tada, Rainbow Dash nails. Make sure to cover with a clear topcoat if you don't want them to chip.
Also, see why no blue? you only have 5 fingers and if you want your hands to be mirror images of each other...I mean, you could do all 6 colors if you wanted, continue on your other hand, but I didn't really want to do that.
It's about time Rarity gets the spotlight, don't you think?
This is the beautiful white velvet cupcake with purple frosting. And of course, you will be making this from scratch. It might be hard work, and if you do it exactly as I did, it will be a huge mess, but it will be worth it.
You will need: 2 c flour 2 tsp baking power 1 tsp salt, plus a pinch for egg whites ½ c (1 stick) unsalted butter 1 ¼ c sugar 2/3 c milk 1 tsp vanilla extract 3 eggs (whites only 1 c mini-marshmallows 1 can vanilla frosting blue & red food coloring dash cocoa powder
Mix together the flour, baking powder, and salt.
In a separate bowl, beat the egg whites with the pinch of salt until they are fluffy and form stiff peaks.
In yet another bowl, cream together the butter and the sugar.
Combine the butter and sugar with the flour mixture and the milk. This will be sticky and quite tough, so you may want to use the beater again.
Fold the egg whites into your dough.
Add the mini marshmallows and fold in.
Fill your cupcake pans 2/3 full. It won't make a full 24 cupcakes. I was lucky in how many it made--I had exactly 14 papers left!
Bake at 350 degrees for 25 minutes. Careful, though--you can see the marshmallows dripping out in there! As I said before, this will cause a bit of a mess.
Take them out and let them cool.
Take the vanilla frosting and mix it with the food coloring. It's very difficult to get the deep rich color of Rarity's mane, but do the best you can. Add a dash of cocoa powder for a subtly chocolate flavor.
This is a tricky step I should not have attempted, but I'll tell you how. Spoon the frosting into a ziplock bag, seal it, and cut off a corner. Then you have a makeshift icing bag, and can frost your cupcakes in the delicate way shown on that first cupcake at the top of the post.
Unfortunately for me, the bag popped after frosting that one. There was frosting everywhere. It was really quite disgusting.
I sounded like this:
I salvaged what I could of the frosting and finished the other cupcakes by spreading the frosting with a knife. I don't think I'll be trying an icing bag again.
They don't look so bad, now, do they? If you'd like to have a little extra sparkle, as I chose to do, use silver glitter sprinkles or white coarse sugar. It's just that perfect little touch to make these cupcakes as exquisite as Rarity herself.
The white velvet cupcake recipe is from How To Eat A Cupcake. It's a good blog for anyone interested in baking.


